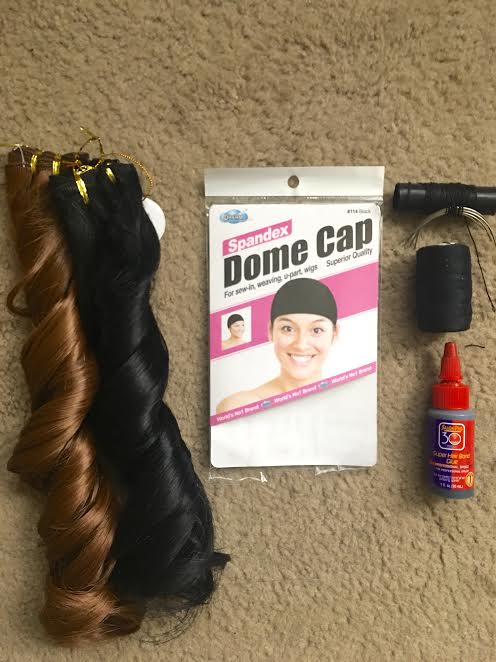
Ever wanted a style you can wear for protection against heat damage or while you workout? A U-Part wig is perfect if your looking for a quick, go-to style. Women who love U-Parts usually don't want glue or heat in their hair or they'd rather skip the hours it takes to complete a contemporary sew in.
What you'll need to get started:
1. Your Hair
2. A Dome Cap
3.Needle & Thread
4. Hair Glue
5. Shower Cap/Plastic Bag
Once you've gathered your items, shampoo & condition your natural hair and then braid it. Braid pattern doesn't matter necessarily. However, you want to make sure you braid sturdy along your perimeter because this is where you will sew down your U-Part Wig.
After your hair is braided, place your shower cap or plastic bag on your head
( as I didn't have a plastic shower cap and needed to improvise)
and put your dome cap on over it. (Like so in the image below)
This helps keep the glue from seeping through the
dome cap and getting on your hair.
After you've put shower cap/plastic bag and dome cap on your head,
your ready to start bonding your extensions onto the dome cap.
*If your using a more expensive brand hair, I suggest you
sew your extension onto the dome cap.*
Make sure you leave enough space to cut out
where your leave out is going to be. This area
will be covered with your natural hair once sewn
onto perimeter.
Now that you have your hair attached to your dome cap, blow dry the hair glue/extensions
(if it's bonded) with a blow dryer first for about 5 minutes before taking off
and removing the plastic bag/shower cap. Once completely dried and the glue has
adhered to the cap, peel off the plastic bag/ shower cap very carefully.
Cut all excess material from around your cap.
This causes for a better snug fit.
Take your time so you won't accidentally cut your extensions.
Lastly, before sewing along your perimeter, try on your U-Part Wig
making sure it's just right. You don't want any lumps or bumps.
If everything measures correctly, thread your needle and sew!
You may need silver hair clips to help hold in place
while you sew along your perimeter.
Sew sturdy but not too tight where your pulling on your edges!
Once your sewing is completed and your U-Part is
secure, begin to style as desired. Make sure to moisturize
your leave out well. Having dry, brittle leave out causes
more damage and breakage to your hair when heat is applied,
Especially if you have highly textured or coarse hair.
I use coconut oil daily on my natural leave out.
Add me on Snapchat @boojiBEE
For more beauty buzz on hair, nails and makeup or MUA related topics subscribe to my blog or check back weekly!


No comments:
Post a Comment